

Creating a pond-less water feature
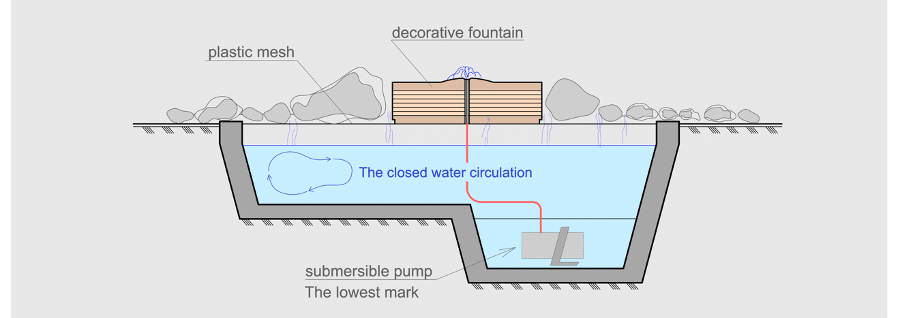
Elevation of a “pond-less” water feature.
Does this sound familiar? Dig a hole in your backyard, throw in a rubber liner, put many rocks around the perimeter (ah, the ubiquitous stone necklace), drop in a pump, and presto, you have a garden pond. It used to be original but now it’s everywhere. Many folks didn’t realize at the time that they carry with them just a tad bit of maintenance.
Please don’t get me wrong. I like water gardening and indeed have a pond in my own backyard. But there are places where a full-blown water garden complete with a rushing stream looks appropriate and places where one fits in about as comfortably as a Rolex in a dollar store.
We probably agree on one thing, though. The sound of moving water is indeed relaxing. Here is some advice on creating and installing a smaller, funky water feature with some personality. On your next flea market shopping spree, keep your eyes peeled for a conversation-inspiring contraption. Once you find it, ask yourself, “How can I get water to run through this gadget?”
Finding just the right yard art for your garden will take some time. I have one client who can’t wait to go back to Japan on business so he can find that elusive but perfect piece of statuary for his Asian-themed garden. Then there are the rest of us, satisfied to rummage through junkyards and salvage lots in our quest for true art.
For me, it was a pedestal sink that said, “Garry, take me with you.” I was searching for a small but interesting water feature as the last piece of my shade garden that sits alongside my screened porch. The sink has added a creative touch to the design.
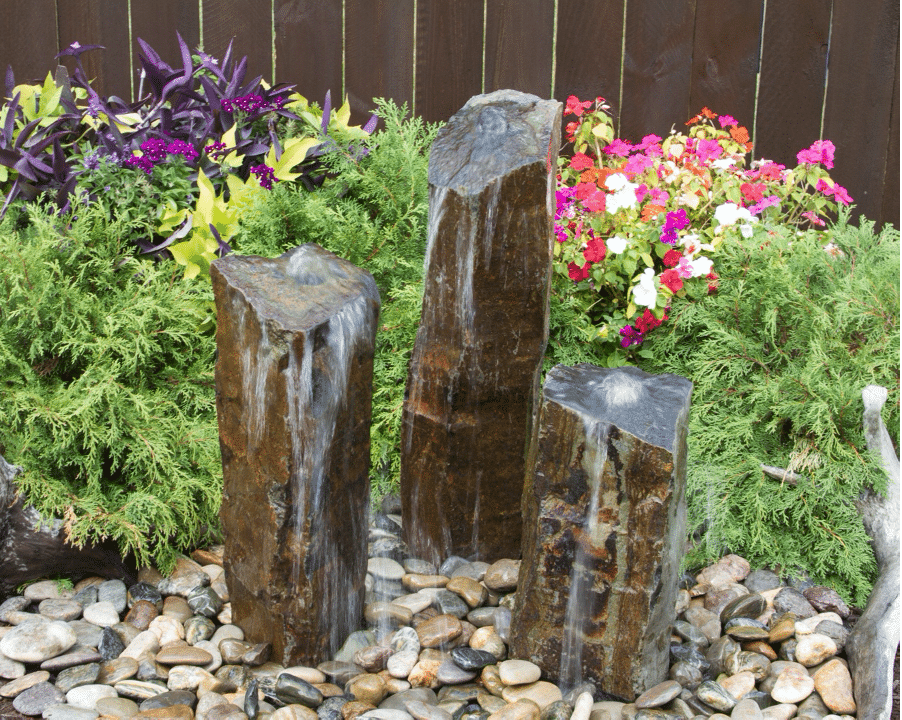
A nice trio of stone creates the perfect focal point.
6 STEPS FOR GOING POND-LESS
1.Take time to choose the perfect spot: First, choose the location where the gentle sound of running water will give you the most enjoyment. Do not just look at places where you currently have electrical power available. (A fountain in the carport probably won’t give you much enjoyment). Once you find the right spot – perhaps one that serves as an attractive focal point – have an electrician install a GFCI outlet in a nearby place where it can be hidden behind rocks or plants.
2.Create the water reservoir: Dig a hole that will accommodate a five-gallon bucket (or thereabouts). This will be your reservoir of water in which the pump rests. Make sure the lip of this bucket of slightly higher than the surrounding grade so any overflow from rains, etc. has a chance to escape. You may also want to install some type of observational tube or indicator to allow you to see when the water level gets low to prevent the pump from burning out.
3.Place a large stepping stone over most of the opening of your reservoir bucket or tub: You will need a little bit of room to slip through the drainpipe and outflow tube from the pump, and the electrical cord. Depending on how the water flows from your “art” you may opt for an iron or steel grate which may rest completely over your reservoir and then concealed with river rock.
4.Choose an appropriate pump for the job: When you’ve completed the first three steps, it’s time to make a run to the garden center in search of a pump and tubing. You must get the same size tubing as the pump outflow indicates. A word of advice about pump selection. On the box, you will see numbers like 150 gph (gallons per hour), 200, 300, etc. That number is the amount of water that will typically flow to a height of about one foot. As the height of the water feature above the pump increases, the gph gradually decreases. So, if you want 150 gph to flow through a water feature five feet high, you’ll have to buy a bigger pump. (Check the box for information about “maximum lift” or “head height” to make sure the pump will do the job.)
Also, you should buy a pump that has some type of flow control so you can tweak the flow rate and alter the sound of the trickling water. Each pump is a bit different, so it’s best to follow the included directions when you’re ready to install fittings and clamps. Here’s one good trick to remember: don’t put the pump directly on the bottom of the reservoir. Instead, set it on a brick or two that sits in the bottom of the bucket. By elevating the pump, any crud that builds up in the bottom of the bucket will stay clear of the pump’s intake, thus prolonging its life.
5.Install a “Y” valve for emptying old water: If you’re ambitious, you can install a Y-valve on your outflow tubing. This will make it easier to empty the reservoir bucket when the water gets old or green. (If you have a really small water feature, you can probably skip this step.)
6.Position the water feature: Now that you’ve made at least three trips to your hardware store to exchange hoses, fittings, and clamps, you can install the water feature. Position your sculpture over the base stone or grate, connect the pump and tubing, fill the reservoir with water, and plug in the pump. You may also want to highlight this wondrous creation with a low-wattage, narrow-beam spotlight for nighttime enjoyment.
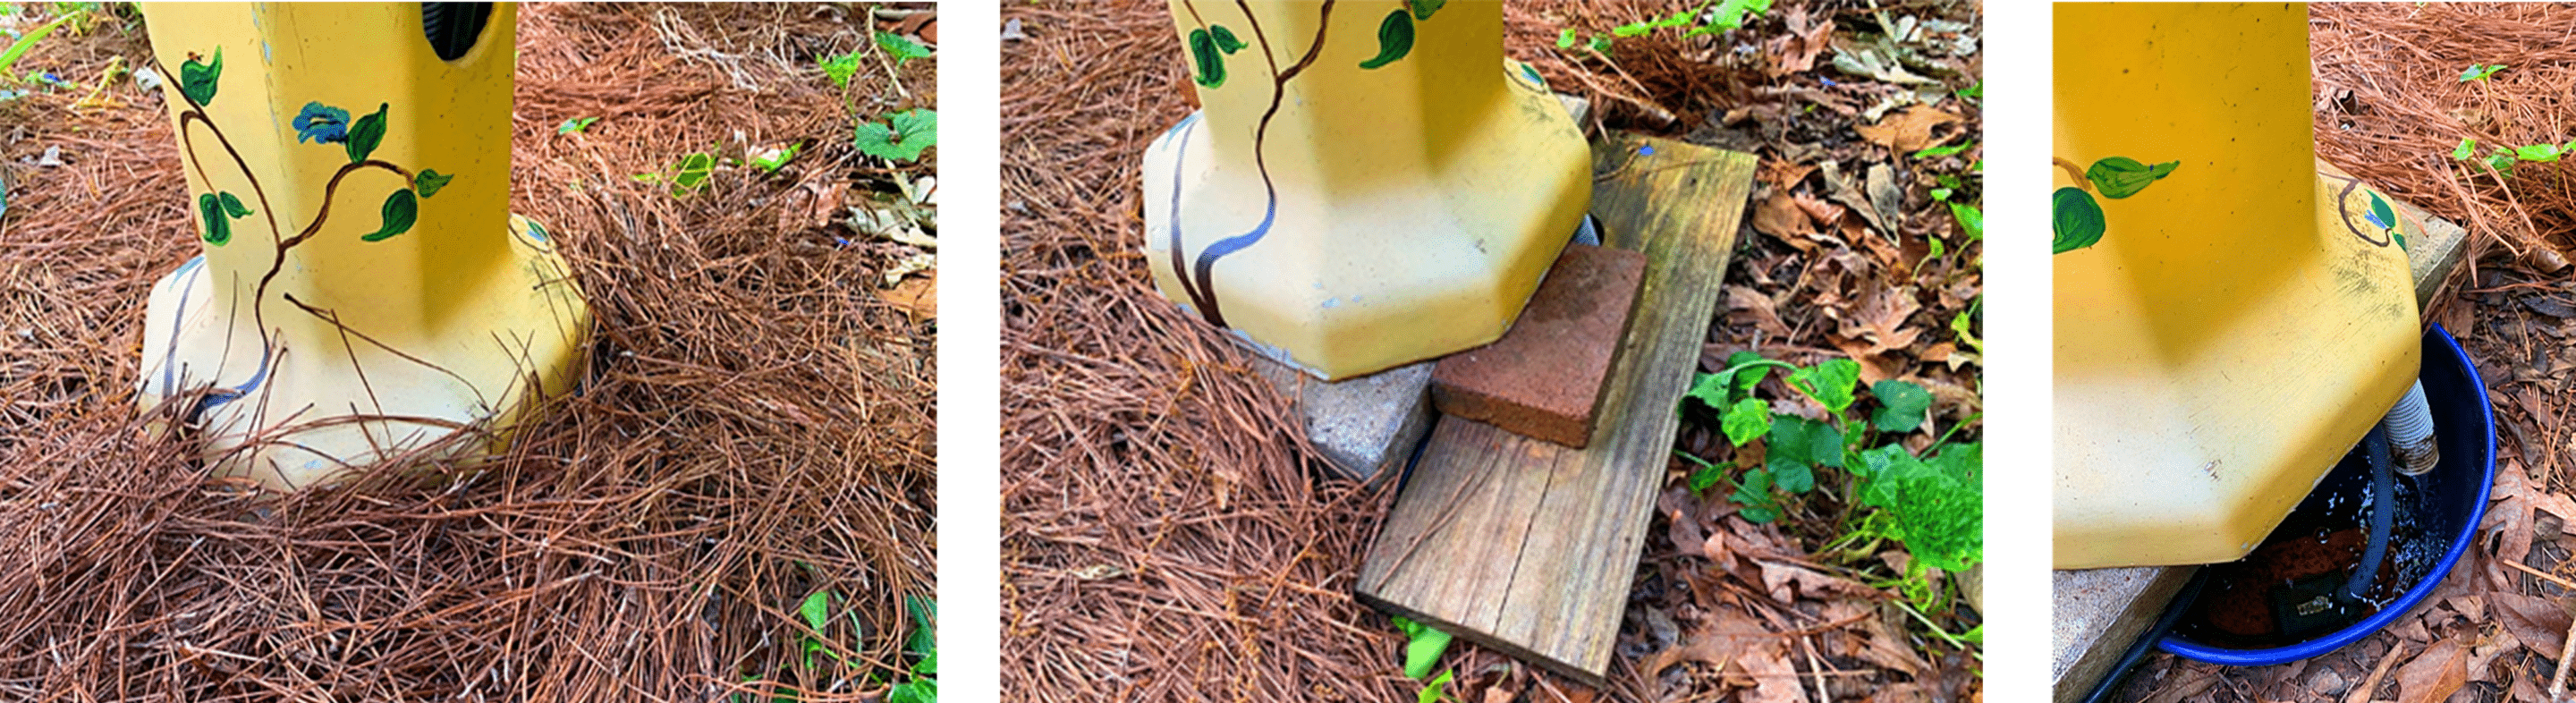
The base of our funky sink fountain.
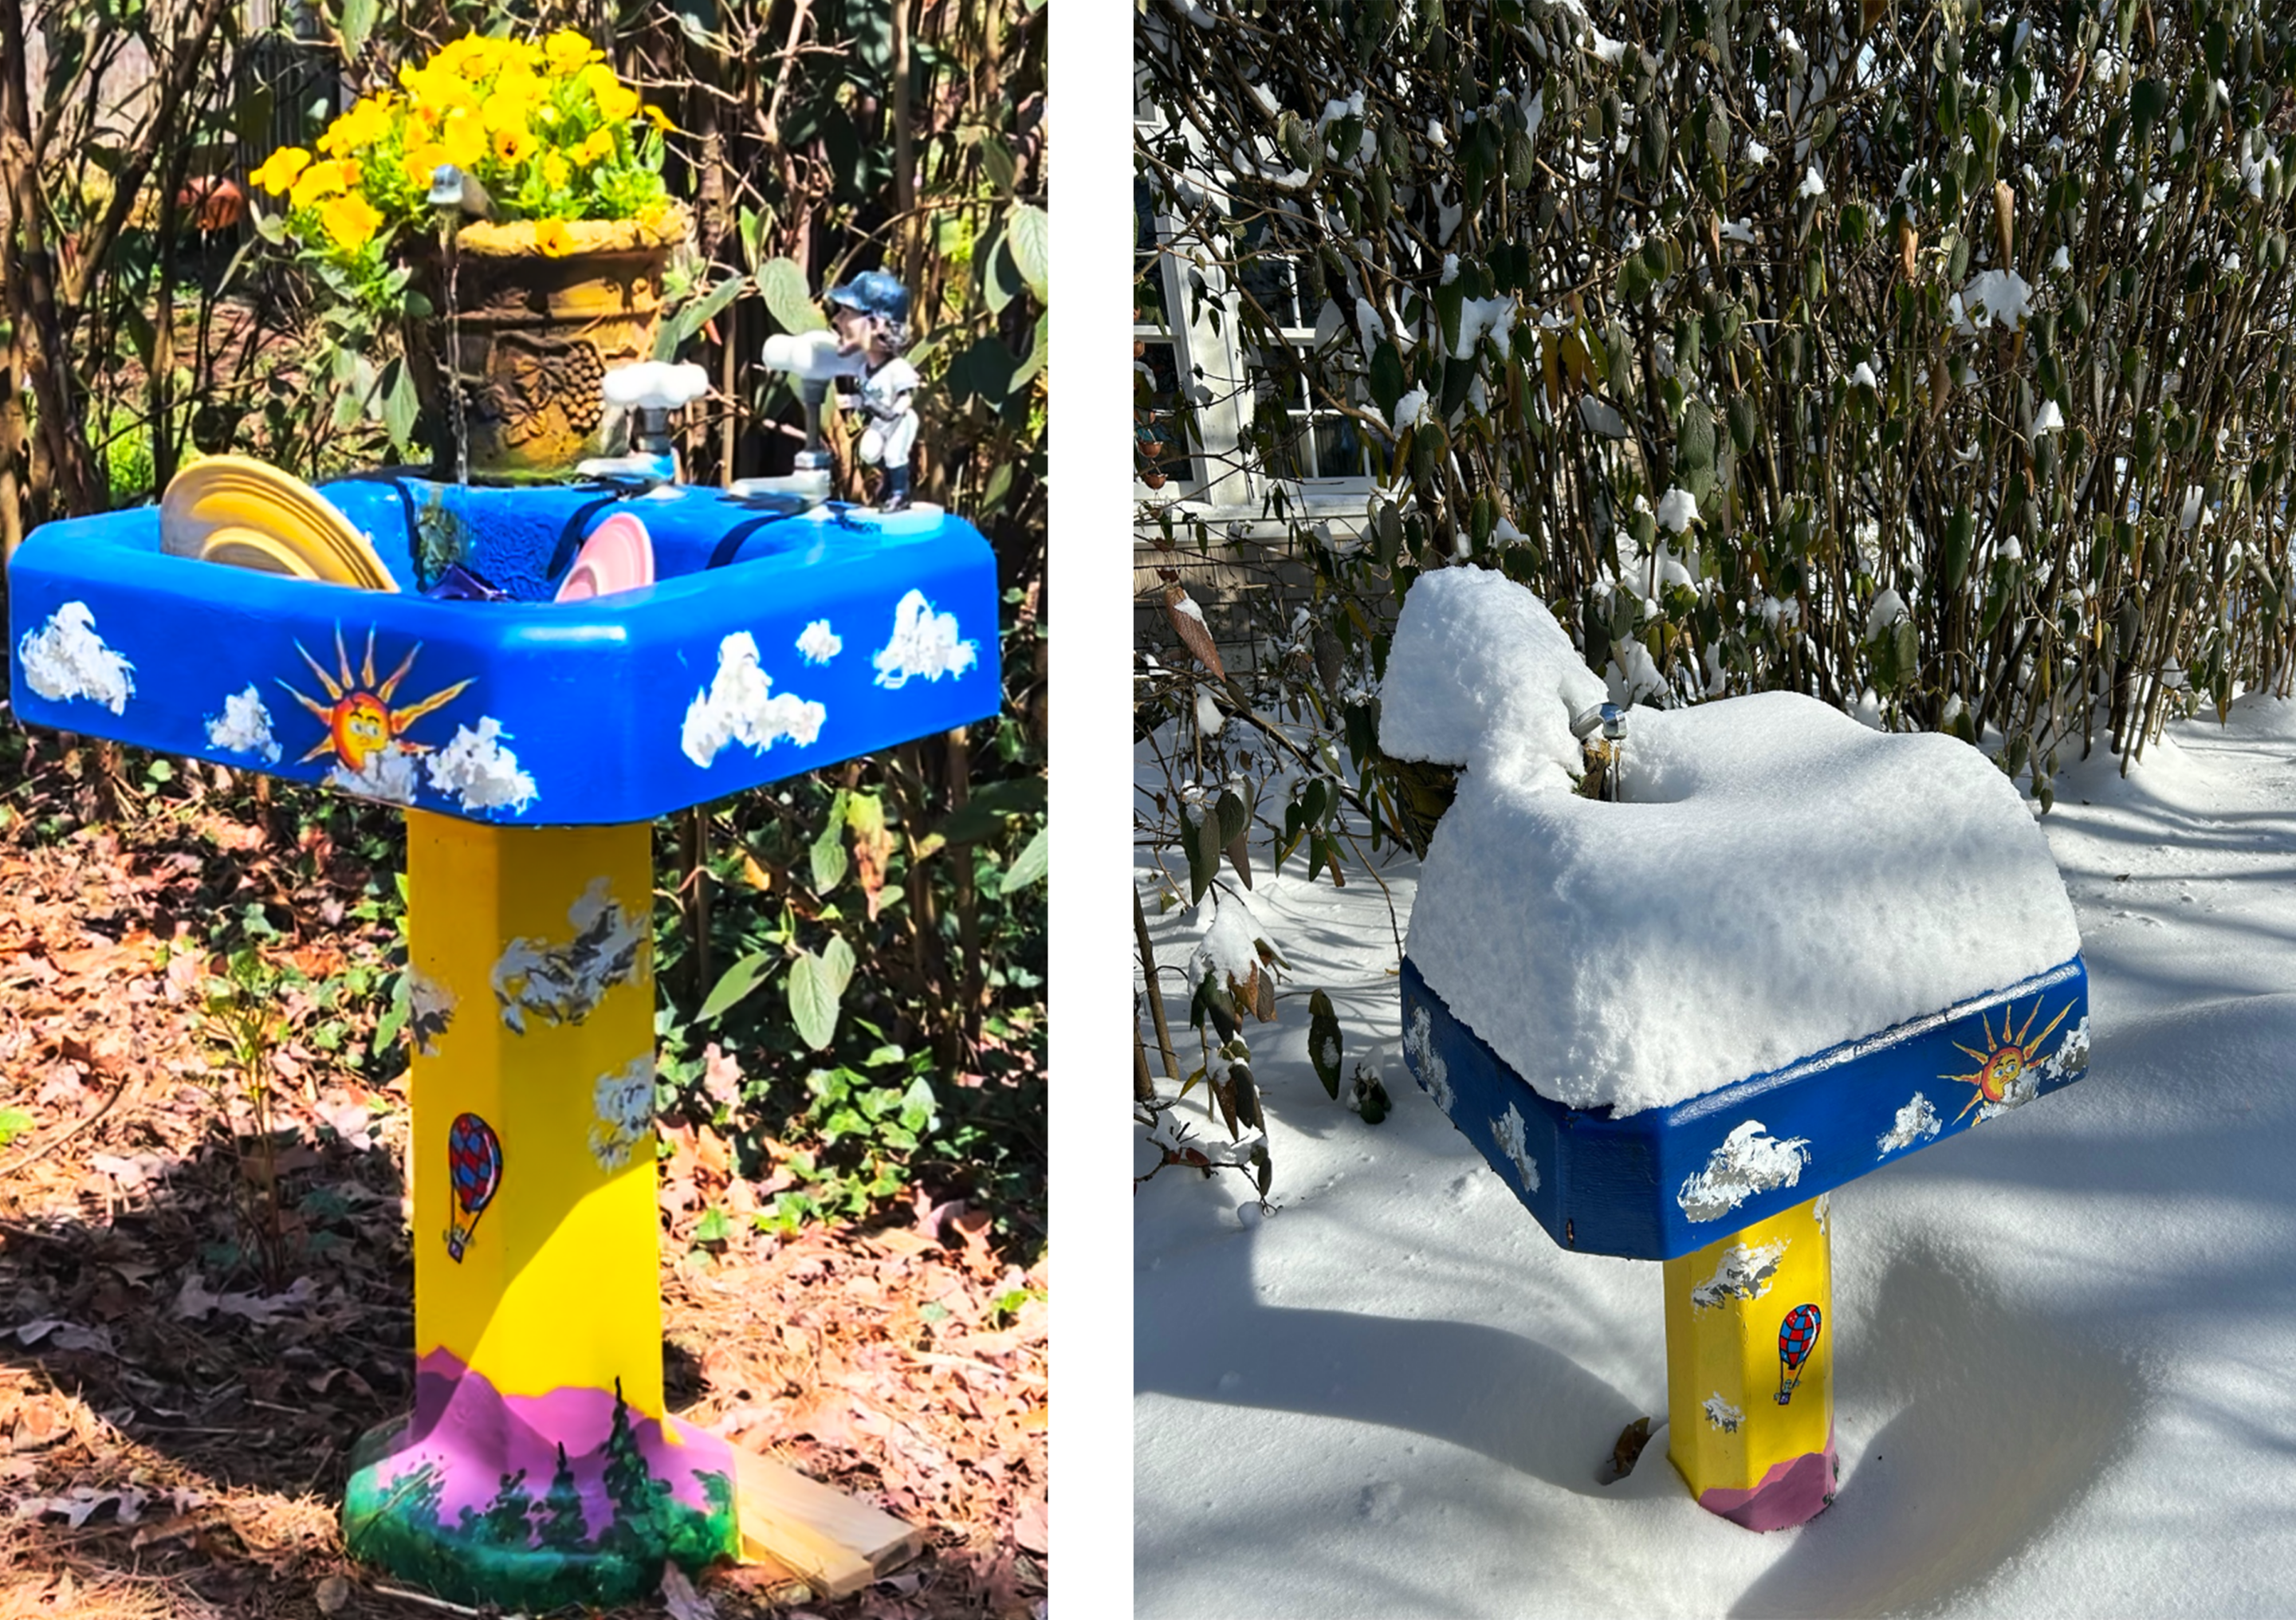
I love living in a place that has seasonal variety!
So, get out there and make a splash in your garden but watch out for the gnomes. Rumor has it they get a little cranky when wet.
Till next time,
KEEP THOSE ANKLES DRY!
PS- I am really trying to increase my readership so if you could find in your heart or keyboard to let your friends know about this very cool, informative site AND get them to subscribe, I would be most grateful!
Please share! https://ahomeforyourgnome.com/